In this article, we will discuss orthographic projection.
1. Orthographic Projection
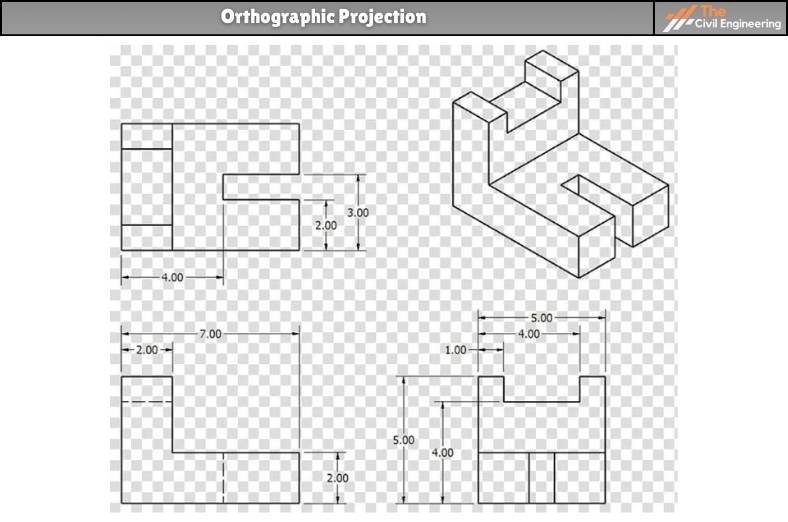
The word “orthographic” is known as right angle and “projection” refers to a view obtain in a plane at a right angle with each other.
If the projectors are parallel to each other and right angle or perpendicular to the plane of projection, a view or projection is obtained on a plane of projection which is known as an orthographic projection.
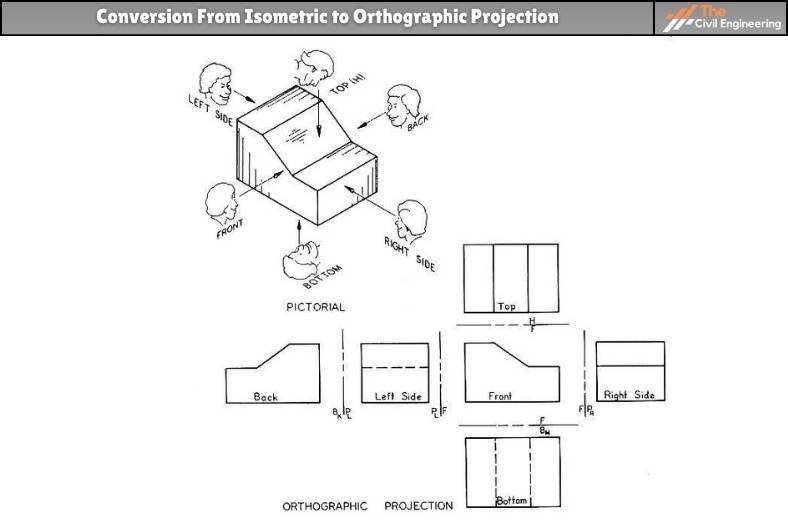
The plane which is used for the purpose of projection is called the plane of projection. The orthographic projection includes the various views of an object i.e. elevation, plan, bottom view, etc.
The figure representing vertical faces on an object such as front view, side view, and the rear-view is called elevation, showing a view of the top of an object is called the plan, and showing a view of the underside is called bottom view.
2. Principles of Orthographic Drawing
The following principles should be understood before drawing orthographic projections:
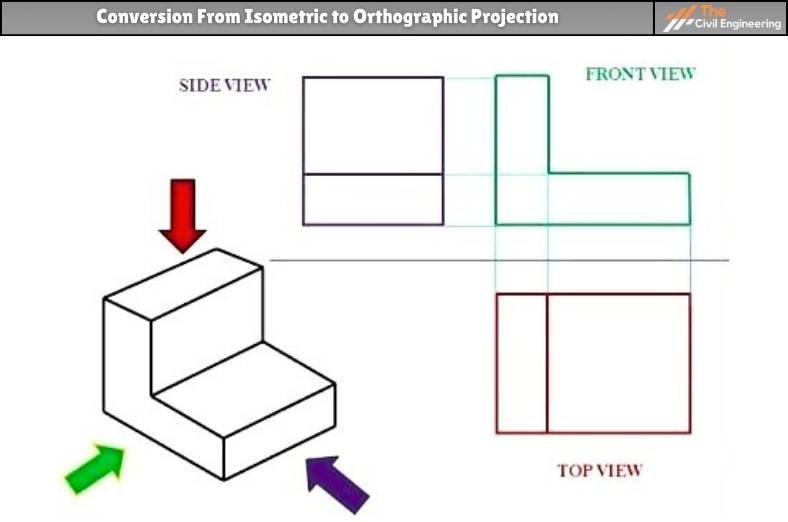
a. The top view (plan) and front view (elevation) are always in line vertically.
b. The front view (elevation) and side view (end elevation) are always in line horizontally.
c. The length of the top view is always the same as the length of the front view.
d. The breadth of the top view is always the same as the breadth of the side view.
e. The height of the side view is always the same as the height of the front view.
f. If a line is parallel to a plane of projection, then it will show its true length on that plane.
g. If a line is perpendicular to the plane of projection, then it will represent a shorter length than the true length on the plane of projection.
h. If a surface is parallel to a plane, then its projection on that plane will show its true shape and size.
i. If a surface is inclined to a plane, then the projection on that plane will be foreshortened.
j. If a surface is perpendicular to a plane, then its projection on that plane will be a line simply.
( Note: Most students get confused in separating orthographic and isometric projection.
2D – Orthographic Projection
3D- Isometric Projection )
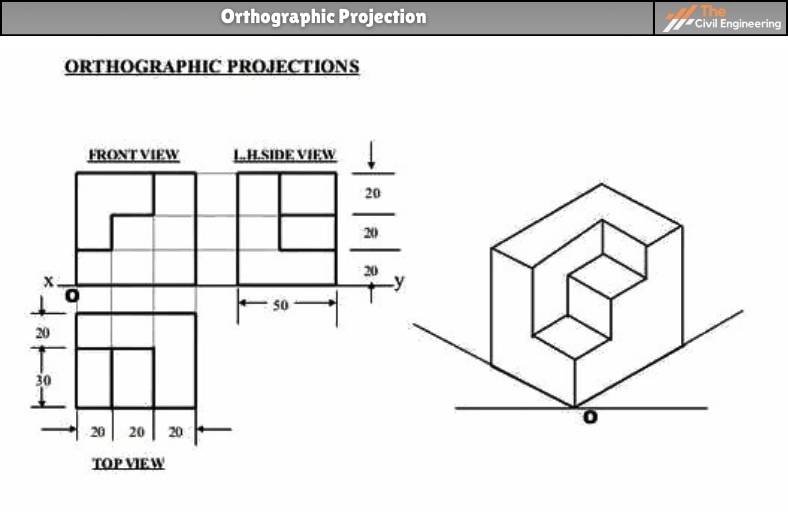
3. Conversion From Orthographic to Isometric Projection
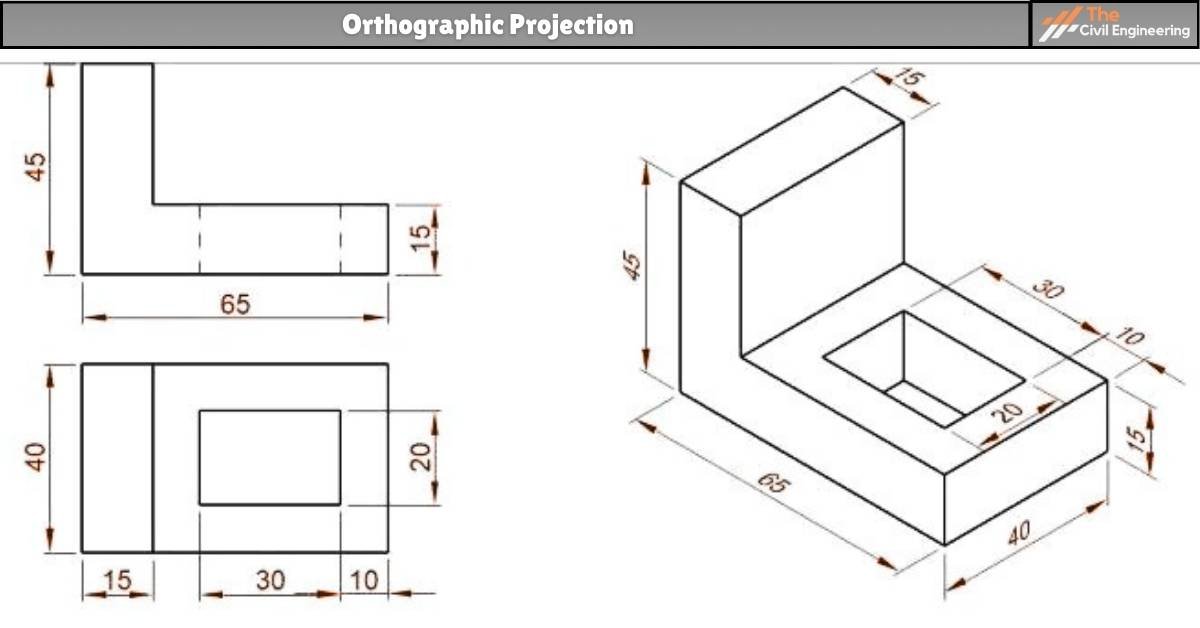
4. Conversion From Isometric to Orthographic Projection
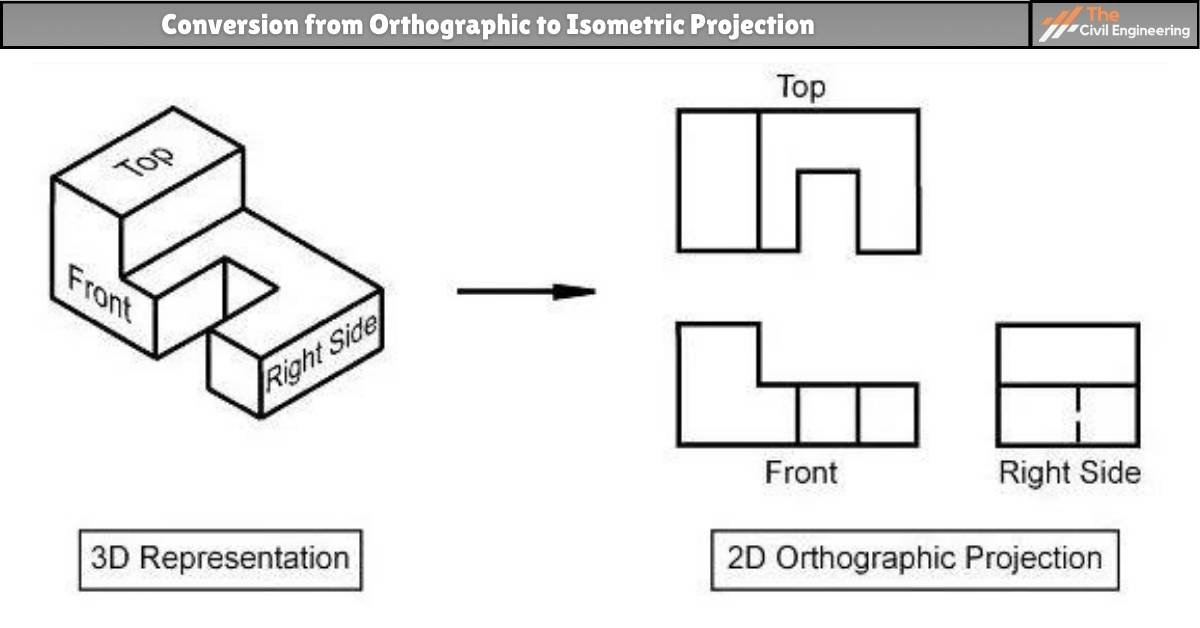
5. Difference Between Orthographic & Isometric Projection
| S.N. | Orthographic projection | Isometric Projection |
| 1. | It shows the true size of the object. | It does not show the true size of the object. |
| 2. | It is used for making the project. | It is used to have a better understanding of the object. |
| 3. | It is typically a 2-dimensional view of the object. | It is typically a 3-dimensional view of the object. |
